Friday, October 16, 2020

Cranberry Jelly with orange

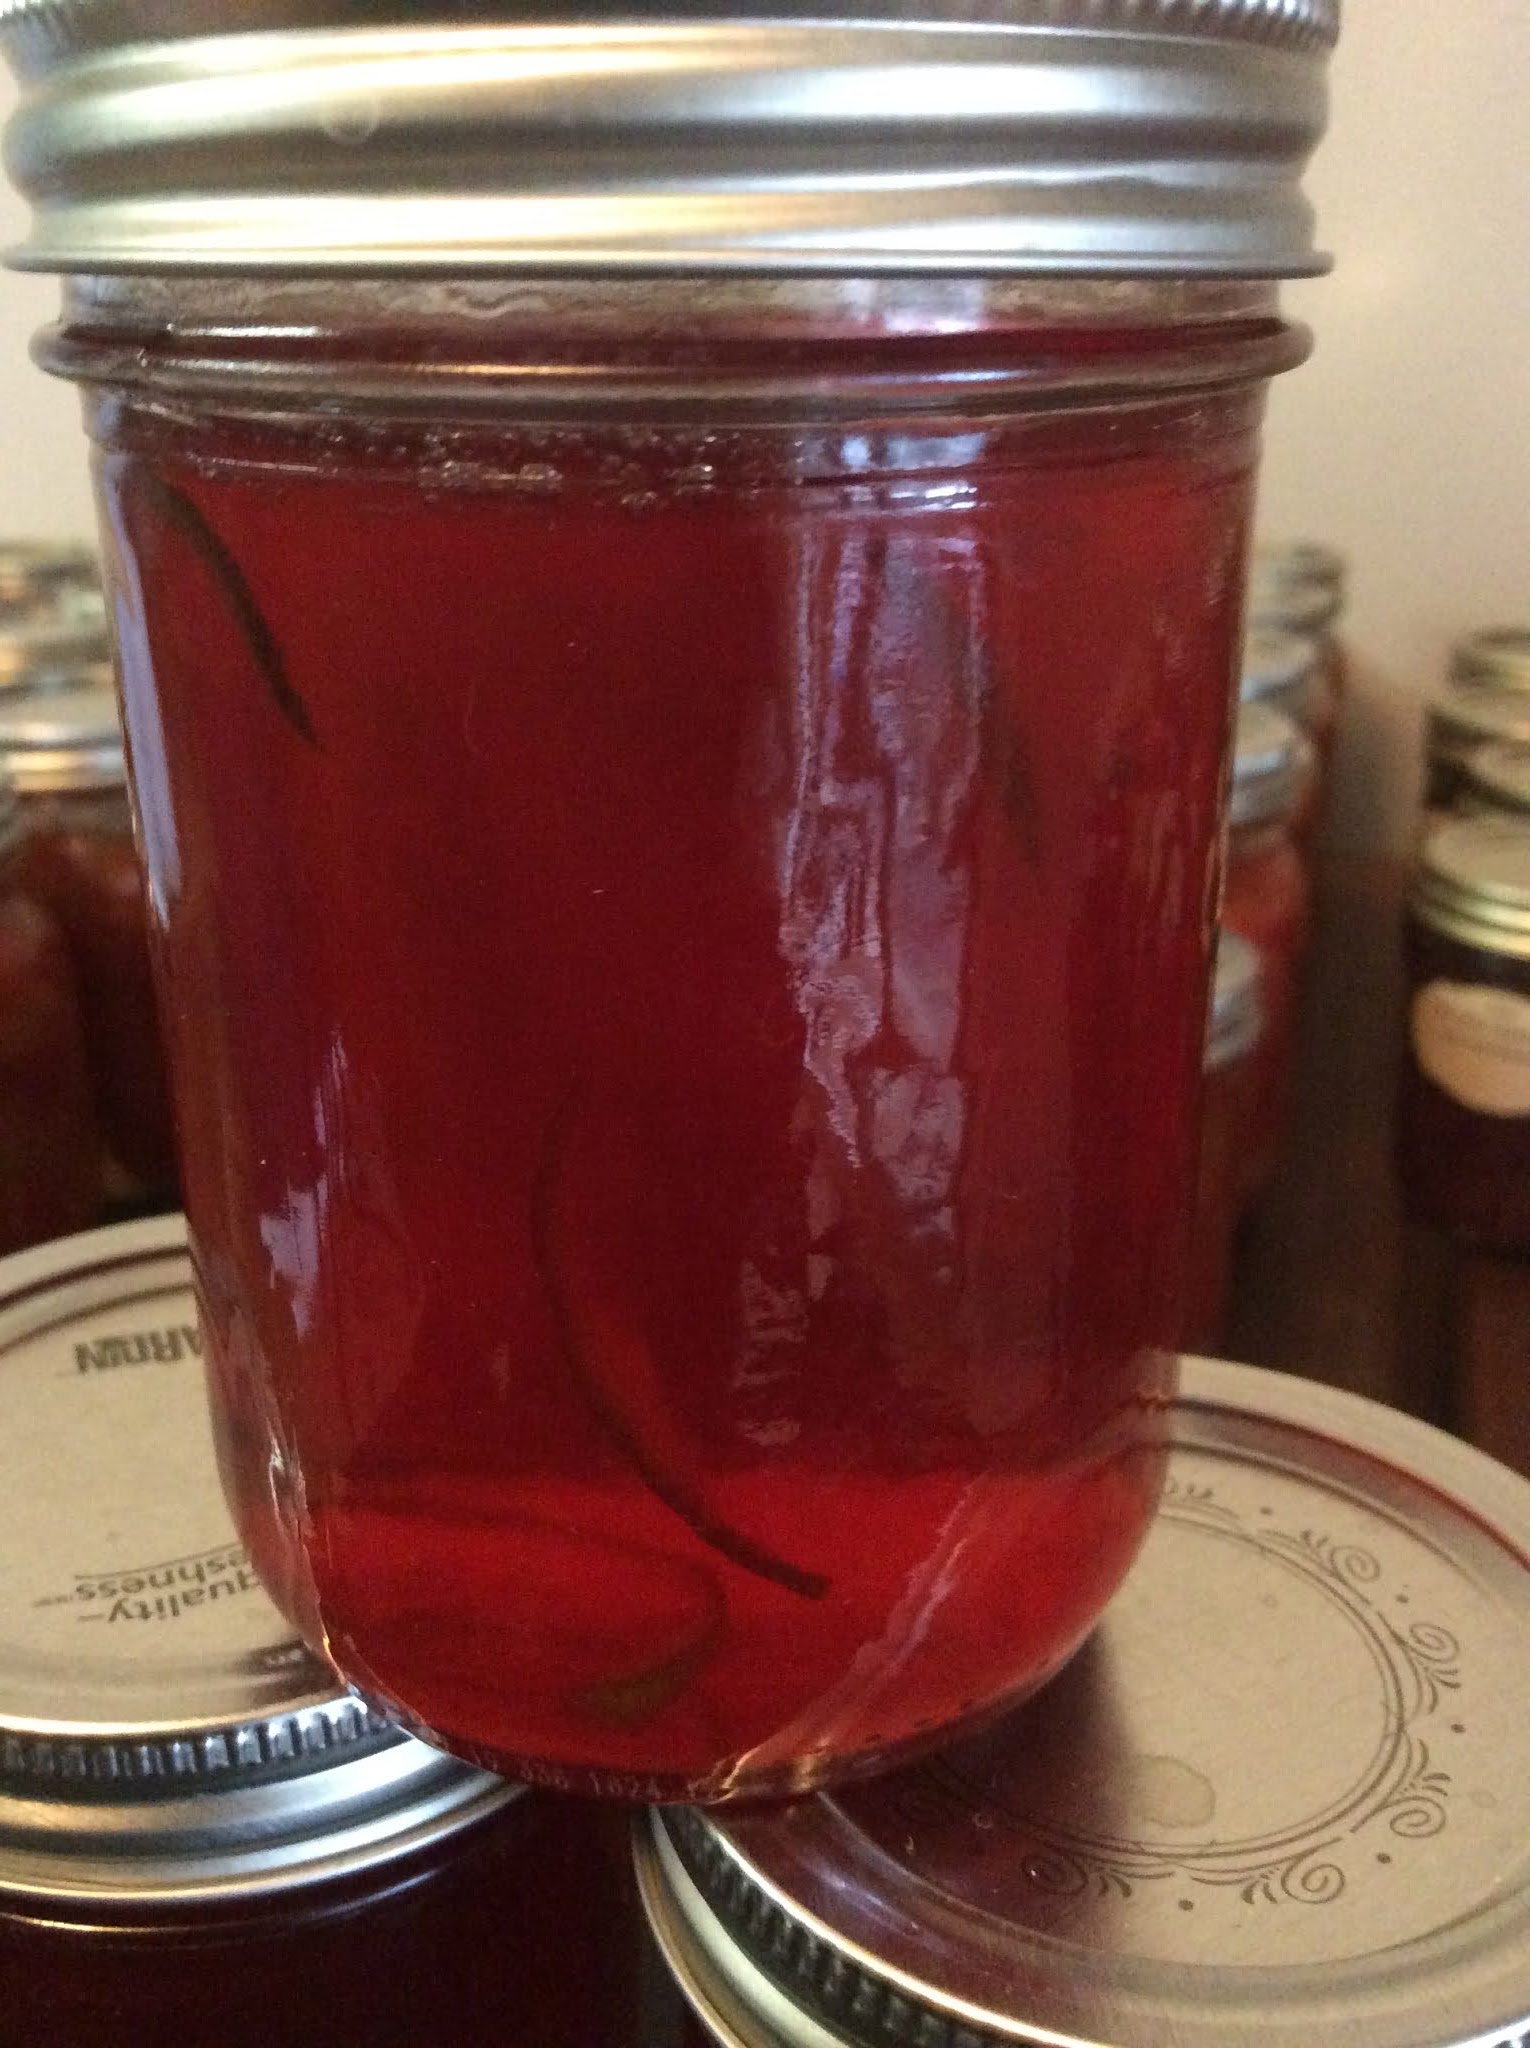
 This cranberry jelly is easy to make, especially with a steam juicer, does not need commercial pectin and is absolutely delicious served alongside your Thanksgiving turkey!


Makes approximately five 250 ml jars

Ingredients:

3 lbs golden delicious apples

2 lbs fresh or frozen whole cranberries (for juicing)

1/2 navel orange, process into small bits in a food processor

2 cups fresh cranberries, process into small bits in a food processor

5 cups water

about 6 cups of sugar


Directions:

Wash apples and cup into large chunks.   Place the apples, along with the cleaned and stemmed cranberries, into the top of the steam juicer. Bring to a boil, then simmer for about 1.5 to 2 hours, being sure to check the water level in the steamer.

Measure strained juice into 6 quart pot.  Add 2 cups of sugar for every 2 cups of juice.  

Stir over low heat until sugar has completely dissolved.  Add the processed orange and cranberries

Bring to a boil and boil rapidly without stirring until candy thermometer reaches 220°F. (This temperature ensures that there is enough sugar for the pectin to form a gel.)

Remove from heat and skim off any scum that has formed on top of jelly.

Pour into sterilized jars. Seal and label.

Wednesday, September 9, 2020

Red Onion Relish- simmered in red wine and delicious!

This has been a family favourite for years!  And now I can pick my onions right from the garden.  I have used this relish to flavour gravies, added it to soups, garnished dishes, stuffed it into beets... Absolutely versatile and crazy delicious.  A great addition to the charcuterie tray, right next to the brie.

I have tripled this recipe mainly because I love it and a bottle of wine provided three cups.  Beware, it will take much longer to thicken, at a low simmer.

Makes approximately 3 - 250 ml jars

Tuesday, September 8, 2020

Grand maman's Ketchup aux Fruits - continuing the French Canadian tradition

This ketchup evokes wonderful memories of traditional Christmas dinners and my mom's ketchup aux fruits.  It's a tradition worth continuing and I am happy to keep making it every fall.

You'll need all the fall favourites: tomatoes, peaches, pears etc.  It's easy to make and always a popular Christmas hostess gift.  


To make approximately 14 500ml jars.

Maple Bourbon Jelly

 A happy preserve made with Maple bourbon- very special.

Using the apple pectin stock made with local apples in the canner steamer (instructions also included for the stove top method), we moved on to make our own jellies.  

The maple bourbon we added to the jelly smelled, and tasted, devine.  I am looking forward to sharing this jelly with friends and family!


To make approximately five 250 ml jars. 

Heat and Sweet Habanero Jelly

 My 2020 garden blessed me with great amounts of hot peppers.  This jelly is delicious and different.  It is based on a recipe from Cathy Barrow, the author of Mrs Wheelbarrow's Practical Pantry.  This is fast becoming a go to preserving book for traditional, and not so traditional, delicious preserves.  There are a few different ingredients in this jelly: honey, dried apricots and dried cranberries.  They mellow the heat of the habaneros and the cranberries add a ruby colour.

This is the version with dried apricots and dried cranberries.  We also made a version without the cranberries.

There’s a lot of mincing/dicing. I like to use the dicing attachment for my KitchenAid mixer, but you can also use your food processor to blitz everything until it’s minced up tiny but NOT liquified. Use gloves when handling the peppers or you risk burning eyes, lips, fingers from the oils in the peppers.

These make perfect hostess gifts- you can also use 125 ml jars for gifting.

Makes about six 250 ml jars

Grape Jelly

My excuse (does anyone need an excuse?) for making this jelly is that the grapes were on sale.  Can't help but pickup a couple of boxes for grape jelly making.  Delicious!

Jelly making is so easy with a steamer juicer - no more picking off stems - and a steamer canner - no more huge pots of boiling water. I love my toys and my jellies!

Makes approximately six 500ml jars

Apple Pectin from scratch - a blank canvas- get creative!

Barb and Don are fortunate owners of a small apple orchard.  What to do with all those apples?  Well, how about pectin, for making jelly?  Take about ten pounds of not so ripe apples, wash and clean them then stash them on the top of a steam juice.  Couldn't be simpler!  In a few hours, you have eight cups of beautiful, clear apple pectin stock, ready to make jelly.  Our inspiration came from Saving the Season by Kevin West.

This recipe makes about five 250ml jars

Siempre Tequila Marguerita Jelly

I love Siempre Tequila- full disclosure- my son is co-founder and co-owner of Siempre Tequila. He and his partner put a lot of love and time into nurturing their award winning top shelf brand.

Using the apple pectin stock made with local apples in the canner steamer (instructions included for the stove top method), we moved on to make our own jellies.  

The tequila and lime we added to the jelly smelled, and tasted, wonderful.  I added the salt to mimic the salty rim of the margarita glass- taste your jelly before canning to determine if, and how much, salt you would like to add, or omit.  I am looking forward to sharing this jelly with friends and family!

Fun note- we used real limes for the juice and the zest. If you throw in the lime shells, they will add more pectin to the mix and become deliciously candied.  Fish them out of the jelly before putting into jars and enjoy the "candy."

Those are lime rinds floating around in the jelly

To make approximately five 250 ml jars.

2021 plan: sold out- 10

Wednesday, September 2, 2020

Salsa Verde with tomatillos

In 2020, my garden blessed me with a bounty of tomatillos.  Beautiful, big ones!  **You can substitute green tomatoes for the tomatillos.

When you pull the husk back on the tomatillos, they look like small, green tomatoes and are covered by a sticky substance. Just husk and wash, they are ready for chopping and cooking. 

This salsa is terrific as a dipping sauce, and can also be used in chile verde or green posole.


To make approximately three 500ml jars 

Ingredients

4 lbs             tomatillos, husked, washed, and finely chopped 

1 cup            finely chopped onion (about 1 medium onion) 

3 to 4            jalapeño peppers, minced (seeds removed for a milder salsa) 

8 cloves        garlic, minced 

1 tbsp           ground cumin 

2 tsp            sea salt 

½ cup          bottled lime juice 

¼ cup          minced fresh cilantro (I add it just before serving)

Directions:

The KitchenAid dicer makes quick work of dicing the vegetables.  Combine the tomatillos, onion, jalapeños, and garlic in a large pot. Bring to a boil, then reduce the heat and simmer 10 minutes. Add the cumin, sea salt, lime juice, and cilantro. 

If you prefer a smoother salsa, you can use an immersion blender to break down some of the salsa at this time. Cook for an additional 10 minutes. 

Taste the salsa and add more salt, cumin, or lime juice if necessary. Ladle the hot salsa into the prepared jars, leaving ½ inch of headspace. Wipe the rims, apply the lids and rings, and process in a boiling water bath for 15 minutes. When the processing time is up, remove the canning pot from the heat and remove the lid. Let the jars sit in the pot for an additional 5 minutes. This helps to prevent the salsa from reacting to the rapid temperature change and bubbling out of the jars.


Roasted Salsa Verde (with green tomatoes)

 This salsa is traditionally made with tomatillos but it can also be made with green tomatoes.  We are now in September and I am staring at a bounty of green tomatoes- perfect!

It is equally delicious served with tortilla chips, topping tacos or simmering chicken enchiladas... The roasting adds another level of flavour.

This recipe is based on one from the Ball Book of Canning.


Makes approximately four 500ml jars.

Jalapeno (mostly) Bread and Butter Pickles

 My 2020 garden is bursting with hot peppers!  What to do with the bounty?  Everyone loves bread & butter pickles - why not make some with jalapeños, mostly, with a few other peppers thrown in: poblano, serrano, etc.  Looking forward to topping tacos and burgers or on the side of roasts...  on a charcuterie plate.


I let them sit in the jar for a few weeks before trying them, to allow the heat to mellow and the flavours to meld.  Would you like them milder?  Place them at the back of the fridge for another month and then taste...

If you are new to pickling with hot peppers, it is highly recommended that you wear plastic gloves when cutting and seeding the peppers.  Don't touch your eyes or your lips or they will burn. I know because I tend to forget the gloves :-)

To make approximately three 500ml jars

Sunday, August 23, 2020

Canning Marinara Sauce - a quick pasta sauce

 My 2020 garden is tomato bountiful!  Time to add variety to my tomato preservation agenda.  Today it is marinara sauce and tomorrow it will be passata.  Followed by corn relish with tomato, roasted tomatoes with eggplant.  By next weekend, I will have green tomato chow chow and probably back to roasted tomatoes... It will be a tasty winter!

I am always careful to follow today's canning rules for tomatoes- sauces need extra acid in the form of lemon juice to boost the acidity in the jar.  Everything is steam canned for 40 minutes or whatever time is listed in a tested recipe.  I know granny did it differently back in her day, but times have changed and so has the equipment, thankfully.  I have my workhorse Kitchenaid vegetable strainer attachment and a steam canner to make things easier and faster.

This marinara recipe is based on the one in Food in Jars by Marissa McLellan.  I trust her recipes as she is always mindful of safe canning guidelines.


MAKES 4 500ml jars

Roasted Red Pepper Relish

 This recipe is based on the one found in Kevin West's "Saving the Season"- one of my go to preserving books.

I am proud to announce that all the vegetables needed for this recipe came straight from my garden!  It doesn't get better than that!  I am looking forward to adding it to my charcuterie board in the coming weeks!


This recipe makes 4 250ml jars

Sweet Onion Relish

 Another relish made with vegetables straight from my garden!  This is my first year growing regular white and red onions and I don't know why I waited so long.  These babies were beautiful!  and this relish does them proud.  

This recipe is from Kevin West's "Saving the Season."


This recipe makes approximately three 500 ml jars.

Sweet and Sour Pickled Red Onions - from my garden!

These pickled onions will be perfect on your favourite burger, on a charcuterie board, with your favourite cheese, with your Sunday roast... delicious! 


Makes approximately four 500ml jars

Hot Pepper Relish

 My 2020 garden is a wonderful success!  All the vegetables I needed for this relish were grown in my backyard and there is more to come... My version of this recipe is more 60% sweet peppers and 40% hot peppers (jalapeños, poblanos, habaneros, etc,)  I used the Kitchenaid dicer attachment to quickly prep the peppers and wore my Covid mask over my nose and mouth to protect me from the hot pepper fumes (finally a great use for the mask :-) )


My best taste taster (my son Alex) confirms that its pretty hot.  I will let the jars sit for a few weeks before testing them again.

To make approximately six 500ml jars.

Sunday, August 16, 2020

Tomato Preserving Versatility- Tomato Coulis or Sauce

 This recipe, adapted from a cookbook called Heirloom by Sarah Owens, caught my eye.  My garden overflows with tomatoes.  I prefer to canning over freezing - I would never have enough freezer space and how convenient it is to just open a jar of beautiful tomato sauce?


This recipes makes about 2 500ml jars. 

Moroccan Spiced Sweet and Hot Cherry Tomato Preserves

Great use for all my cherry tomato abundance in this year's garden!  This is great with cooked chicken or lamb, or drizzled on grilled eggplant. It's not crazy spicy, just redolent of classic warm Moroccan spices: cinnamon, cloves, cumin and a touch of lemon.

This recipe was adapted from one by Joyce Goldstein in her book Jam Session.

To make about five 250ml jars.

Indian Style Cucumber Relish

When I first started preserving, one of my favourite books was Put a Lid on It by Ellie Topp and Margaret Howard.  I've prepared dozens of their recipes over the years.  

My version is based on one of their recipes.  It's a mild relish to use as is over a hamburger or mixed with yogourt to make a raita, or to flavour tuna for a sandwich- very versatile.

This East Indian-style cucumber relish recipe uses cumin along with mustard seeds to give a different twist on the familiar. 


To make about five 250ml jars

Saturday, August 8, 2020

Cherry Tomato and Corn Salsa- Finally a Way to Preserve Cherry Tomatoes

 I've been gardening for decades, growing cherry tomatoes, and looking for a great way to preserve them.  This is it!  This salsa is bright, not too spicy, zippy and a joy to add to a taco, top off a soup or just eat by the spoonful from the jar.  So proud to include tomatoes, jalapeños and onions from my garden.

Adapted from the Ball Canning Book- because of the low ph of the corn and onions, you can't play with the quantities of the vegetables.  But, you can play with the herbs and spices.  This is the only tested recipe I could find.

To make 6 500ml jars

Friday, August 7, 2020

Corn Relish with Tomatoes

This isn't your mama's corn relish!  It's tart-sweet from the tomatoes- perfect as a taco topping, on a burger, garnishing a soup- so many possibilities.  Be sure to halve the tomatoes crosswise, and gently squeeze out the seeds and excess liquid before dicing the flesh.

To make about 4 500 ml jars

Tuesday, August 4, 2020

"Any Fruit" Shrub - for a refreshing summer drink.

I have been making shrubs for about one year now.  I read about them online and just had to try.  They are the most refreshing drink you could  have, especially in the summer,  when all the fresh fruit are in season.

So, what is a shrub anyway?  It's a fruit-based syrup, usually mixed with vinegar, to create a delicious, tangy flavouring for drinks.  I usually mix it with sparkling water but have seen some amazing cocktails using shrubs.

A little history on shrubs- in seventeenth-century Britain, the word referred to a fruit liqueur served with rum or brandy.  The version served in southern colonial America is closest to today's version, thanks to the addition of vinegar.

Shrubs are experiencing somewhat of a resurgence today, thanks to an increased interest in preservation and the swathes of mixologists looking to create unique and delicious cocktails in bars.

The recipe is pretty basic and can be used with most fruit.  I prefer the cold method of making shrubs and it is probably the most authentic.  Keep in mind that if you find the vinegar taste "too much", just let it mellow a few more days and it will balance itself.  Check out the Food52.com website for more shrub ideas.  Enjoy!

Monday, August 3, 2020

Classic Dijon Mustard

To make approximately 1 and 1/2 cups.
Ingredients
1 ½ cups        white wine (ideally a white Burgundy, or a crisp Chablis or sauvignon blanc)
½ cup             white wine vinegar**
1 medium       white onion, chopped   
2                      large cloves garlic, chopped
4 oz                 dry mustard powder (ground yellow mustard seed, about 1 cup + 2 tsp)
2 tbsp              honey
2 tsp                salt
Dash or two of Tabasco or cayenne pepper (optional)
Directions
Combine wine, vinegar, onion and garlic in a medium saucepan. Bring to a boil over high heat, then reduce heat and simmer for 5 minutes. Remove from heat and allow aromatics to steep in the wine for 10 – 15 minutes

Strain vegetables from the infused wine, pressing on solids to release all the juice. Return wine to the saucepan and add salt, honey and Tabasco, if using. Over medium heat, whisk in the mustard powder; continue whisking and heating until the mustard comes to a boil. Stirring constantly, boil mustard until it reduces to your desired thickness, remembering that it will thicken further upon cooling (I cooked mine for about 10 minutes). Taste and adjust seasonings

Fill hot jars to a generous 1/4-inch headspace (more like 1/2-inch), tamping down the mustard into the jar. Thoroughly bubble by passing the handle of a wooden spoon along the edges and middle of the jar. Wipe rims, affix lids and process in a boiling water bath for 10 minutes. Allow to rest for 5 minutes in the hot water prior to removing from the canner.
Wanna play?
*I read somewhere that most traditional Dijon mustard is made with both red & white wines. Feel free to experiment with half red:half white wine, or maybe red wine vinegar with white wine.

Tequila Jalapeño Lime Mustard

Once you have made your own mustard, I guarantee you will never to back to store bought.  So far I have made four great tasting, artisanal mustards: Canadian Club Rye Whiskey and Maple mustard, Stout Beer and Honey Mustard, Grainy White Wine Mustard and Classic Dijon Mustard.  They've all been taste tested by family (my best critics) and friends.  Thumbs up!

These are all small batches you could double up.  This tequila and jalapeño mustard will be perfectly paired with Mexican BBQ and tacos.

This recipe makes about three cups of mustard.

INGREDIENTS

6              jalapeño peppers, divided
1 cup       tequila
1/2 cup    brown mustard seeds
1/4 cup    yellow mustard seeds
1              cup apple cider vinegar
1/2 cup    yellow mustard powder
1/4 cup    honey
3 tbsp      lime juice (fresh or bottled)
1/2 tsp     sea salt

Directions

Slice 4 of the jalapeño peppers in half, retaining seeds. Add to a small saucepan with the tequila.  Bring to a boil over high heat, then reduce heat to low and simmer for 2 to 3 minutes. Remove from heat, press on the peppers with the back of a spoon to release juices, then allow to steep for 5 to 10 minutes.

Strain the tequila into a small bowl, pressing on the peppers to extract juices.  Add the mustard seeds to the infused tequila, cover, and let sit overnight (or until the seeds have absorbed most of the liquid; at least 4 hours).

Prepare canner, jars and lids.

Halve and seed the remaining  jalapeño peppers. Add the soaked mustard seeds, with any remaining liquid, the jalapeños, and the cider vinegar to a food processor.  Process until most  of the mustard seeds are chopped; leave some seeds for a grainy texture, or chop completely for a smooth mustard.
Transfer the pureed mustard seed mixture to a medium saucepan.  Add mustard powder, honey, lime juice and salt; whisk together over medium-low heat.  Bring to a simmer, stirring constantly, and reduce mustard to the desired consistency, remembering that it will thicken upon cooling (about 5 – 10 minutes for this).

Ladle hot mustard into hot, sterilized jars to 1/4-inch headspace, remove air bubbles, wipe rims, affix lids and bands, and process in a boiling water bath for 10 minutes.

Bourbon Maple Mustard

Who knew that bourbon in Canada  is rye whiskey?  I learned something new... This mustard, made with maple syrup is delicious- great bourbon (really rye) flavour twinned with that greatest Canadian sweetener, maple syrup.  I have yet to meet someone who doesn't love this combination.

This is great as part of a cheese board, right beside the meats or as a topping for sandwiches, burgers  or sausages.  Be sure to age it about one or two months before opening the jar.  Your patience will be rewarded.

Yield: Approximately three cups (3 x 250ml jars)

Ingredients
1 cup      Canadian Club Rye*
1/2 cup   filtered water
1 cup      brown mustard seeds
1/2 cup   cider vinegar
6 tbsp     dry mustard powder (ground yellow mustard seed)
1/2 cup   maple syrup (or substitute honey or brown sugar)
1 tsp salt

Directions:
Combine the rye, water and mustard seed in one litre canning jar (or a small bowl).  Mix to wet all seeds, and then allow to steep until nearly all of the liquid is absorbed, about four hours, or overnight.

Prepare the canner and the jars/lids.

Transfer the steeped seeds to the bowl of a blender (Vitamix is perfect for this job) or a food processor; process until smooth, or leave grainy, as you prefer. Add vinegar, mustard powder, maple syrup, and salt and process briefly to mix. Transfer to a medium saucepan.

Over medium heat, stirring constantly, bring mustard to a boil; continue on a low boil until it reduces to your desired thickness, remembering that it will thicken further upon cooling (I cooked mine for about ten minutes). Taste and adjust seasonings (add additional water if you need to tinker with the flavor and the mustard is getting too thick).

Fill hot jars to a generous 1/4-inch headspace (more like 1/2-inch), tamping down the mustard into the jar. Thoroughly bubble by passing the handle of a wooden spoon along the edges and middle of the jar. Wipe rims, affix lids and process in a boiling water bath for 10 minutes. Allow to rest for five minutes in the hot water prior to removing from the canner. Store in a cool, dark spot for up to one year.

* For a milder bourbon/rye flavour, you can substitute 1/2 cup of water for 1/2 cup of rye.
I suggest you let this set for about two months after processing to give the flavours time to develop.

Whole Grain Beer Mustard

Make sure you buy a good quality beer and be sure to let the mustard age a few weeks before opening!


To make about 3 cups

Grainy White Wine Mustard

It was difficult finding mustard recipes that could be processed and shelf stable.  This white wine mustard is wonderful- with everything.  Enjoy!

Makes 3 250ml jars

Ingredients:

1/2 cup        yellow mustard seeds
1/4 cup        brown mustard seeds
1 cup           dry white wine
1 cup           apple cider vinegar
1/3 cup        light brown sugar
1 tbsp          garlic powder
1 tsp            onion powder
1/2 tsp         freshly ground black pepper
1/2 tsp         sea salt
1 tsp            grated lemon zest

Directions:

Combine both kinds of mustard seeds and wine in a medium pot and bring to a boil.

Remove from heat. Cover pot and allow the seeds to sit for 2-12 hours or until all the liquid has been absorbed.

Prepare a boiling water bath and heat the jars. Place the lids in a small saucepan, cover them with water and simmer over very low heat.

Transfer seeds and any remaining liquid to a blender or food processor.

Add 1 cup (250ml) of water and blend until the seeds are fairly well broken down, the texture of the mustard is up to you. If you like it more smooth, blend it longer.

Transfer the seed mixture back into the pot which they were soaked in. Add the cider vinegar, brown sugar, garlic powder, onion powder, pepper, sea salt and lemon zest and whisk until combined.

Bring the mustard to a boil, then reduce the heat and simmer until it reduces and thickens (approximately 10 minutes).

Ladle the mustard into the prepared jars being sure to leave 1/2" of headspace.

Wipe the rims, apply the lids and rings, and process in a boiling water bath for 15 minutes.

Chocolate Babka- Memorable!

I have made this delicious bread many times, and shared it with the neighbours.  Because if I kept it in the house, I would eat it all, by myself, no sharing!

This is an easy project and sooooo good.

To make 2 loaves (9 x 5 inches)

Radish Relish

What to do with a major surplus of radishes?  A gift from my local farm market- or more like a challenge.  There aren't too many radish recipes out there :-)

Makes about 6 250ml jars

Honey pickled radish- who knew you could pickle radish?

I love my local farm!  Cléroux Farms is just fifteen minutes from home  (in Ottawa- Innes and Navan Roads) and offers up wonderful seasonal produce of all kinds.  When they asked if I could "do something" with a box of seriously overgrown radishes, I took up the challenge.

My Kitchenaid slicing attachment made quick work of the slicing which I chose to do instead of halving or quartering.

To make about 3 500ml jars.

Blueberry Ketchup - no tomatoes in this ketchup!

Ketchup can be so much more than tomatoes.  With so many blueberries available in July- why not?  This ketchup is spicy and smoky from the adobo, fresh with the ginger and the blueberries and the lime- so much goodness in a jar!  It is based on one published in Saveur magazine a few years ago.  It will keep in the refrigerator for about a month, or you can process it to keep it shelf stable for up to a year.

To make 3 250 ml jars

Pickled Eggplant with Mint and Garlic

My 2020 garden is filled with beautiful eggplants!  What to do to preserve them?  One of my favourite recipes is this one, based on the one found on the Serious Eats website.  I am looking forward to serving them on crostini topped with feta, pickled eggplant and drizzled with olive oil.

To make 2 500 ml jars

Pickled Fairy Tale Eggplant

One of my favourite preserving experts is Marissa MacLellan, the author of at least three preserving books and an informative and entertaining (to an avid canner :-) ) blogger - Food in Jars.

In 2020, I had the foresight to plant a few Fairy Tale eggplants and was delighted to find this quick, easy and tasty pickle.

This recipe makes 3 500 ml jars.

Giardiniera Sott'Aceto

Back in the day- when I had teachers on my Christmas gift list, the kids and I would make their teachers a giardiniera.  Hey, I was sure they had enough coffee mugs!

This pickle is a quick and delicious way to use up a variety of fresh garden produce and the quantities are flexible: cauliflower, cukes, carrots, beans, green tomatoes, sweet peppers.  A great addition to the charcuterie table.

This recipe was adapted from "Preserving the Italian Way" by Pietro DeMaio.


I made 3 750ml and 4 1litre jars.

Bread and Butter Pickles

Sweet, thin cucumber slices canned in a classic turmeric yellow, sweet syrup. Who didn't grow up with these pickles served along with your favourite sandwich?  In my home, it was usually a grilled cheese.


To make about 4 500ml jars.

Sweet Pickle Relish - using up the garden giants :-)

Confession: I "found" four huge, oversized pickling cucumbers in my garden.  They weighed in at four pounds.  What to do with these giants?  Well, they were perfect for making relish- a double recipe.

One of my favourite preserving books is written by Cathy Barrow - "Mrs Wheelbarrow's Practical Pantry."  This recipe is adapted from Cathy's book.


This recipe makes about 3 250ml jars.

Thursday, July 30, 2020

Chipotle Barbecue Sauce - not just for summer

**to preserve this sauce, you will need to pressure can.**

There are two barbecues in my backyard so I am always looking for great sauces, especially ones I can preserve.  This recipe is based on the one found in Mrs Wheelbarrow's Practical Pantry.  One of my mainstay canning resources.  I will say this sauce is an investment in time and ingredients and well worth it!

It hits all my high notes- spicy, thick, sweet, complex and great on pork, chicken, burgers- just about anything you want to grill or smoke.

Plan ahead- you will need Strawberry Rhubarb Sauce, tomato purée (I used my homemade purée) and tomato ketchup (I would have like to use homemade but settled for store bought).

To make approximately 4 500ml jars.

Ingredients:
500 ml           tomato purée
355 ml           ketchup, homemade or store-bought
500 ml           strawberry rhubarb sauce
500 ml           strong black coffee
120 ml           water
120 gr            molasses
60 ml             cider vinegar
60 ml             bourbon or rye (optional)
1 tbsp            asian fish sauce
1 tsp              hot sauce
1/2 cup          minced onion
1/4 cup          chipotle chiles in adobo sauce (use less chiles and more sauce if you want to lower the heat)
1 tbsp            minced garlic

Directions:
Place all the ingredients in a heavy 5qt pot- stir and bring to a boil, then reduce the heat and simmer, uncovered, until thick- about one hour.

Laddle the sauce into clean 500 ml jars- clean the rims, place the lids and rings on the jars.

Process for 30 minutes at 10 pounds of pressure.

This sauce remains shelf stable for about one year.

Tuesday, July 21, 2020

Gooseberry Jam-

I had never considered gooseberry jam before but when someone issues a challenge, I am always up for it.  So these little berries are new to me and I never thought a flat of these would take about three hours to "top and tail"  i.e. clean up and prep.  Kuddos to all those German, Dutch and Eastern European women who prepared their annual batches!  Now that I know gooseberries, I will incorporate them into my annual rotation- but as gooseberry-raspberry jam. Why? because my steam juicer eliminates the need to top and tail- a great time saver and you still get the great taste!

This recipe was found in The Joys of Jewish Preserving by Emily Pastor.  I have enjoyed preparing a few of her preserves- in the Jewish European or Middle Eastern traditions.  I am always on the "hunt" for new takes on preserves and am happy with Emily's approach.
Selection of early summer preserves...


This makes about three 250 ml jars.

Tuesday, July 14, 2020

Aaliyah's Favourite Strawberry Lemonade Concentrate

Aaliyah's favourite summer drink is lemonade.  This strawberry concentrate hits all the right buttons: her favourite summer berry paired with the sourness of lemons, sweetened with a little sugar (actually quite bit of sugar) which she can mix herself with water or ginger ale.  It's in a special place in the pantry...

You can substitute strawberries with any other favourite berry or use a mix of blueberries, raspberries, cherries, etc... just keep the proportions of fruit to lemon juice and sugar the same.  Note: i have decreased the amount of sugar in some batches, by as much as 50% - for more tartness.

The recipe is based on one found in the Bernardin Complete Book of Home Canning.

Makes about six 500 ml jars.

Rhubarb Jam with Strawberries and Lemons

This recipes combines the best of spring fruit: rhubarb and strawberries.  I have based this recipe on Marissa McClellan's, Food in Jars.

Rhubarb is the harbinger of spring.  Finally, this year, I remembered to set aside rhubarb for making a rhubarb strawberry jam.

Makes 10 250 ml jars

Strawberry Vanilla Jam

This jam is based on Marissa McClennan's in Food in Jars.  I made it for the first time in 2019 and didn't like the strong vanilla flavour, overwhelming the strawberries, I thought.  Now, many people tried it and loved it.  After making the jam, I place the vanilla pods in a jar of sugar and it sat in my cupboard until this year.  I have made it again, using two cups of vanilla infused sugar in addition to 3 cups of regular sugar.  I added the pods from the sugar to the strawberry mixture while it macerated.  Perfect...

Makes eight 250 ml jars.

Gooseberry and Raspberry Jam

I have an old preserving book, published in the '80s by Time Life books.  It has been well used over the years as it covers all types of preserving methods.

Last week, my local farmer convinced me to try my hand at preserving gooseberries, a fruit that is new to me.  Had I known how much work goes into cleaning (topping and tailing) these tiny fruit, I might have reconsidered- they are a lot of work to prep, except for this recipe.  Thanks to my steam juicer, all I need to do is wash the berries and place them, stems and all, in the top of the juicer- perfect.  And, bonus, gooseberries have a lot of natural pectin, so it will set quite readily.

This gooseberry and raspberry jam is familiar (because of the raspberries) but with the gooseberry twist- a little tartness.  It is delicious!  This jam, I will make again!

To make 10 250 ml jars.

Ingredients:

1.5 lbs      gooseberries, rinsed
3 lbs         raspberries, rinsed
                 sugar

Directions:

Place the gooseberries in the top portion of the steamer-juicer.  Put about three inches in the bottom portion and steam the berries for approximately 1.5 hours.  The beauty of the steam juicer is the clarity of the juice it produces.

Alternatively, you can remove the stem from the gooseberries and place them in a pan.  Cover with cold water and bring slowly to a boil.  Simmer gently for about one hour, until the berries are softened into a mush.  Pour into a jelly bag and leave the berries in the bag without squeezing or mashing until all the juice is extracted.  Measure the juice.

Pour the juice into your preserving pan, adding one cup of sugar for every 1 1/4 cups of gooseberry juice, plus four cups of extra sugar to sweeten the raspberries.  Stir gently until the sugar dissolves, then bring to a boil.  Add the raspberries.  Return to a boil and boil for about 15 minutes, until the jam reaches the jelling point (220 degrees on your thermometer).  Pour the jam into your prepared 250 ml jars, clean the rims of the jars, place the lids on and process in a boiling water bath canner for ten minutes..

Monday, July 6, 2020

Strawberry Rhubarb Sauce - does this say spring?

Strawberry and rhubarb anything is wonderful- especially jam.  I was actually looking for a BBQ sauce recipe to preserve and found a Chipotle BBQ sauce in Mrs Wheelbarrow's Practical Pantry- one of the main components of the BBQ sauce is a homemade strawberry rhubarb sauce.  I'm in!

Here is the first part of the recipe- Strawberry rhubarb sauce.  The Chipotle BBQ sauce will follow shortly!

This recipe makes 8 250ml jars.

Decadent Strawberry Chocolate Jam

I've made strawberry, banana, chocolate jam before with great success.  Today's version is decadent, rich, dark and does not include bananas.  This jam is great on croissants, on ice cream or try it mixed into your morning yogourt.


To make 8 250ml jars.

Ingredients

4 pounds       strawberries, hulled and chopped (about 10 cups)
4 cups           sugar, divided
1 tbsp           vanilla extract
3 tbsp            bottled lemon juice
2 packets       liquid pectin
 ½ cup           unsweetened cocoa powder

Directions:
Place the strawberries, 3 cups of sugar and lemon juice in a large, nonreactive pot. Give it several good stirs to help combine the ingredients and dissolve the sugar. Place the pot over high heat and bring to a boil, then lower the heat to medium-high and continue to cook at a low boil, until the strawberries break down and the volume in the pot has reduced by a quarter. Depending on the water content in the berries, this will take 15 to 25 minutes.

While the fruit cooks, whisk the remaining 1 cup sugar together and cocoa powder. Once the necessary amount of reduction has occurred, stir in the cocoa powder mixture. Return the jam to a rolling boil, add the pectin and boil for an additional two minutes. When the jam has finished cooking, remove the pot from the heat. Funnel the jam into the prepared jars, leaving ½ inch of headspace. Wipe the rims, apply the lids and rings, and process in a boiling water bath for 10 minutes.

NOTE: If your cocoa powder is really clumpy, push it through a fine-mesh sieve before combining it with the sugar.


Sunday, June 28, 2020

Strawberry and Cherry Jam

Cherries bring body and extra sweetness to this jam.  It has been my "go to" jam for over a decade.


Makes six 250ml jars.

Ingredients:
1 kg         strawberries, cleaned, hulled and halved
i kg         cherries, cleaned, pitted and chopped
625 gr     sugar
125 ml    lemon juice

Directions:

In a large non-reactive bowl, gently toss together the strawberries, cherries and sugar.  Cover and let stand at room temperature for about two hours.

Transfer the fruit mixture to a large saucepan and add the lemon juice.  Bring to a boil over medium- high heat, then cook over medium heat for about 20 minutes, stirring frequently.  Remove from the heat.

Use 1 tsp jam and a chilled plate to test for readiness.

Ladle the hot jam into jars, leaving 1/4 inch headspace.  Wipe the rims and place the lids on the jars.

Process for ten minutes in a steamer canner (or boiling water bath).  Let the jars sit in the canner for approximately 10 minutes, then set aside for 24 hours.  Label and store in a cool, dark space for up to a year.

Saturday, June 27, 2020

Pickled Garlic Scapes

Many thanks to Barb and Don for sharing a bag of freshly picked garden scapes from their extensive garden.  I had the pleasure of spending a splendid Saturday morning making garlic scape pesto with pistachios and basil fresh picked from my garden (the basil, that is) and the pickled garlic scapes.  Can't wait to get into the jar!


This recipe will make about 3 500ml jars

Ingredients
1.5 lbs      fresh garlic scapes
3 cups      apple cider vinegar (5% Acetic Acid)
3 cups      water
3 tbsp       pure sea salt or pickling salt (salt must not have anti caking agents)
1/4            cup sugar
12             peppercorns (four per jar)
6 sprigs    fresh dill weed (one or two per jar)
1/4 tsp red pepper flakes (per jar - optional)


Directions
Trim the garlic scapes- cut off bottom woody part and cut the pod from the "curly" part.  The curls line the jar and the pod was cut to fit into middle of the jar.  Or, you can cut the scapes into the length that fit the jar (and leave the proper headspace) and place tightly in the jar.

Mix your brine in a pan (vinegar, water, salt, sugar). You will want it hot but not boiling. Taste and adjust the brine according to your taste.

Add the garlic, dill and pepper flakes to each jar. Pack the garlic scapes tightly into the jars leaving 1/2" headspace.

Process in a water bath canner or steamer for ten minutes.  Wait one week before opening the jar.

Garlic Scape Pistachio Pesto

I was blessed with a bag full of garlic scapes this week.  What to do with these delicious beauties?  Well, I combined them with fresh garden basil and parsley to make this pesto and pickled the rest.  For pesto, feel free to substitute the pistachios with pine nuts, walnuts, almonds or whatever you have in your pantry.

This pesto is great with pasta, or add a dollop to smashed potatoes or roasted fresh garden tomatoes- a marriage made in heaven! Oh yeah- makes a great salad dressing....

Garlic scapes blended with pistachio nuts, basil, and parsley. This seasonal pesto freezes well.


This recipe makes about 2 cups and easily doubles.

Monday, June 1, 2020

Korean pickled spring garlic

I rarely see green/spring garlic at the market.  Probably because it gets snatched up as soon as it's out. This year was different yay!  Now, to preserve it.  This recipe is from the Joy of Pickling by Linda Ziedrich.  It's easy to make.

Three days on the countertop

This recipe makes about 1 litre- depending on the amount of garlic you have to pickle.  You want enough brine to cover the garlic.

Asparagus Relish- great use for stalks

This "Batch" recipe provides a great way to use up asparagus stalks when canning the spears.  I also like to use local honey, instead of granulated sugar in this recipe.  Remember to wait a week or so after processing, to open your jars!


 Makes four 250 ml jars

Pickled Asparagus with Tarragon and Green Garlic

This recipe comes from Kevin West's Saving the Season. Thank you Kevin for the plethora of amazing canning recipes I have enjoyed making successfully over the past few years.

I spied a bag of fresh green garlic as I checked out the local farm stand.  What to do with this beautiful, young garlic?  Kevin's pickled asparagus recipe led my 2020 canning season with great success.

Preserving asparagus usually involves cutting away a good portion of the stalk because of the height of the jars and the woody ends.  This year, I am using these pieces to make asparagus relish- no waste.


This recipe makes two 750ml jars or three 500ml jars.

Saturday, May 30, 2020

The 2020 Canning Season Begins! Pickled asparagus- Batch recipe

This recipe is based on a similar one from BATCH, an amazing preserving book which includes preserving, fermenting, dehydrating recipes... I love that the stalks I don't use for this recipe are used to make asparagus relish.  Perfect! Everything was canned...

I love spending a Saturday morning in the kitchen- a wonderful beginning to the 2020 canning season.


To make three 500 ml or four 750 ml jars

Saturday, April 25, 2020

Fabulous Tomato Jam

This is a new one for my pantry and it's delicious.  The recipe is from Marissa Maclenan of Food in Jars fame.  This jam is a little sweet, a little spicy and tastes somewhat like ketchup and but so much better... My son used it as a base for a chicken wings baste and sauce- delicious...


Summer 2019 provided prodigious quantities of heirloom tomatoes in my garden.  This jam is perfect for using up those tomatoes.  Happy to be eating "my" tomatoes well into the winter as part of a cheese board, right beside the meats or as a topping for sandwiches, burgers  or sausages. 

This recipe makes about five 250ml jars, depending on the thickness of the jam and the type of tomato you use.


Ingredients
5 lbs          tomatoes, finely chopped (the food processor works especially well)
3 1/2 cups sugar
8 tbsp        bottled lemon juice
2 tsp          freshly grated ginger
1 tsp          cinnamon
1/2 tsp       ground cloves
1 tbsp        salt
1/2 tbsp     red chili flakes (or more, to taste)
1               lemon, quartered and added to simmering jam

Directions:
Combine all ingredients in a large, non-reactive pot. Bring to a boil and then reduce temperature to a simmer. Stirring regularly, cook at a low boil until it reduces to a sticky, jammy mess. This will take between 1 and 1 1/2 hours, depending on how high you keep your heat.  Or, I bring the tomatoes to a boil, then lower to low and allow to slowly simmer for about ten hours.  Low and slow with a stir once in a while.

When the jam has cooked down sufficiently, remove from heat and fill jars, leaving 1/4 inch of head space. Wipe rims, apply lids and twist on rings. Process in a boiling water canner for 20 minutes.

When time is up, remove jars from water bath and allow them to cool. When jars are cool enough to handle, test seals. Store jars in a cool, dark place for up to one year.


Tuesday, February 18, 2020

Hainanese Chicken Rice - and a variation :-)

I enjoyed my first taste of Hainanese chicken in Vancouver about ten years ago.  I don't remember the name of the restaurant but I do remember the great taste of this chicken dish.  It was really nice to enjoy it at home.

This dish is easy to prepare.  You can easily multitask - while your chicken is cooking, it helps to prepare the ingredients for your dipping sauce and rice. Both of these are usually assembled after the chicken is done because they require the chicken broth, but you can get started washing and soaking the rice, chopping the garlic and ginger. In this recipe, all of the poaching broth is reserved -- some is used in the rice, a small amount is used in the chili sauce, and the remainder is saved to be heated and served as a simple soup to accompany the chicken.  This broth is delicious...

To serve six.

Korean Bulgogi Bolognese - a marriage of Korean and Italian.

I am always on the lookout for great cooking websites.  The New York Times cooking section is one of the top ones.  What I especially love are the comments from cooks who have tried and "tweaked" the recipes.  I also tend to ignore those who have lots to say about a recipe they never tried.

The Korean Bulgogi Bolognese intrigued me.  It is a mashup of my two favourite cuisine.  This is a great dish! Oh, and I forgot to buy egg noodles so I just had to make them from scratch bringing the dish to another level- delicious!
Served with homemade spinach and red pepper egg noodles.
To serve four.

Monday, February 17, 2020

General Tso's Chicken- a take out favourite made at home

I've had my share of General Tso chicken over the years- it's a staple on all the takeout menus.  This home version is easy and fairly quick to make and oh so much better than the takeout versions.  They are coated with corn starch for lighter batter and pan fried (then air fried) instead of deep fried.  Your family and friends will love it!
General Tso's Chicken served with stir fried sweet peppers and steamed broccoli.


To serve four.

Saturday, February 15, 2020

Thai Vegetarian Curry

Sometimes you just want vegetables.  This is a healthy, delicious Thai curry.  Great comfort food and easy to make.  Serve over basmati rice or noodles.


INGREDIENTS
 1              13 1/2-ounce can coconut milk (do not shake can)
½  cup      vegetable stock
4  tsp         soy sauce or tamari soy sauce
4  tsp         brown sugar
6  tbsp      Thai green curry paste
½  cup      diced (1/2 inch) onion
⅔  cup      diced (1/2 inch) red bell pepper
⅔  cup      diced (1/2 inch) zucchini or other summer squash
⅔  cup      diced (1/2 inch) peeled sweet potato
⅔  cup      sliced bamboo shoots, rinsed and drained
1  cup       green beans, trimmed and cut into 1 1/2 inch lengths
⅔  cup     diced (1/2 inch) Asian eggplant
1  lime
8  large    basil leaves, cut into thin chiffonade

Directions

Open the can of coconut milk without shaking it. Spoon 6 tablespoons of the coconut cream from the top of the can into a medium saucepan. Pour remaining contents of can into a medium bowl, and mix well. In a medium bowl, combine vegetable stock, soy sauce, and palm or brown sugar. Stir until the sugar is dissolved.

Place saucepan of coconut cream over medium-high heat until it begins to bubble. Add curry paste and reduce heat to medium-low. Stir constantly until very fragrant, about 3 minutes; adjust heat as needed to prevent burning. Add onion, red pepper, zucchini, sweet potato, bamboo shoots, green beans, and eggplant. Stir until vegetables are hot, 2-3 minutes. Stir in coconut milk, bring the mixture to a boil, and reduce heat to low. Simmer, uncovered, until the vegetables are tender, about 10 minutes.

Add the soy sauce mixture and a generous squeeze of fresh lime juice to taste; you may use the juice of an entire lime. Stir and mix well. Add up to 1/4 cup water if the curry seems too thick.

To serve, place the curry in a warm serving bowl and garnish with the basil chiffonade. If desired, serve over jasmine rice.

Sunday, February 2, 2020

Beer braised bratwurst and sauerkraut

Bratwurst, a german sausage perfect for a backyard BBQ, served with a delicious topping of sauerkraut.  I simmered by sausage and sauerkraut in hard apple cider.  Oh, and my sauerkraut was homemade, after three weeks of fermentation, it still had some crunch.  In the winter, I serve my bratwurst on a bed of sauerkraut, with mashed potatoes.  A great opportunity to use homemade beer mustard.

And, in the summer, grill these beautiful sausages.


To serve four

Saturday, February 1, 2020

Hungarian Beef Goulash

This classic east European dish features melt in your mouth beef,  slowly simmered in a rich broth.  I added potatoes for more body and served it on a bed of egg noodles.  Wonderful!


To serve four...

INGREDIENTS
  • 4 tbsp olive oil
  • 1.13 kg stewing beef lean, cut into 1 inch pieces
  • 1 tsp salt or to taste
  • 1 tsp pepper or to taste
  • 2 large onions roughly chopped
  • 2 medium  potatoes, cubed
  • 5 cloves garlic minced
  • 3 tbsp sweet paprika
  • 1 tsp caraway seeds ground
  • 1 tsp oregano dried
  • 3 bay leaves
  • 122.5 ml tomato sauce
  • 2 tbsp parsley chopped, for garnish

INSTRUCTIONS

Heat a large deep skillet or Dutch oven over high heat then add the olive oil.
When the oil is hot add the stewing beef. Season with salt and pepper and sear the beef until it starts to brown. The beef will release liquid so continue searing on high heat, and the liquid will evaporate.
Add the onions and garlic to the skillet and cook for about 5 minutes until the onions soften and become translucent. Turn the heat down to medium-high.
Add the paprika, caraway seeds, oregano, bay leaves and brown sugar to the skillet. Stir everything together and cook for 30 seconds. 
Add the tomato sauce, balsamic vinegar, beef broth and stir. Bring to a boil, then cover and cook on low for about 2 hours or until the beef is fork tender, stirring occasionally. The liquid will reduce down a lot as the beef cooks, so feel free to add more water as needed.
Taste for seasoning and adjust with salt and pepper if needed.
Garnish with chopped parsley and serve over noodles.

Irish Beef and Guinness Pie

Who doesn't love a home-made pot pie.  A quintessential winter comfort food.  Add a little Irish stout and you have a PIE!  The meat is marinaded in beer, then slowly simmered on the stove top for a couple of hours along with mushrooms, carrots and potatoes.  If you could only smell the aromas in my kitchen.  This recipe will make one large pie for four or four individual pies.


Sunday, January 19, 2020

Devil's curry


This recipe is based on the recipe from Leite's Culinaria website.  Devil’s curry is a classic Malaysian curry, made with a complex curry paste - lemongrass, dried chiles (that how you will control the heat) fresh ginger, turmeric.  It is loaded with satisfying chicken and potatoes. Don't let the name scare you- this is delicious.

To  turn down this devil's heat use mild, dried guajillo and ancho peppers and pass around a homemade hot sauce for others to "heat it up" to their taste.  It is delicious and hearty!


To serve four.

Country Captain Chicken


I ran into this dish listening to an interview of two guys running a restaurant in South Carolina.  It turns out that it dates back to the 1700's when ships arriving from the Far East, India, came to the Southern US ports to trade.  The captains brought the recipe with them.  So, I present to you an American version of curry.


To serve four